
Construction weeks 47 and 48: sprint to the finish
We’re in the midst of the push-for-occupancy phase, which I mentioned in my previous post. There are many moving parts that need to come together. Our biggest challenge has been staying on top of things and ensuring that the things that need doing, get done. Which is why I’ve been MIA on the blog. There’s a ton to catch up on.
But first, we had a rooftop picnic with the girls tonight (on our newly finished rooftop deck!). When we arrived back at our just-ok rental house a few blocks away, Josie started crying. She said “I no want this house”. Ha! I guess we’re all getting a wee bit anxious.
Stairs and screen wall

Stair brackets installed against screen

It glows

Climbing plants to be installed at a later date :)
Our stairs are designed to float between the wall and a 2 storey metal screen wall. So before the stairs themselves can go in we had to install the screen wall and metal bridge. Mark tackled this over a couple of weekends with some great help — huge thanks to Rob Villeneuve, Steve Dufresne, Mike Davis, Graham Dorey, Nick, and Gary Sharp (again! Gary, we owe you so much for all your help on our home). The metal screens support the bridge and the stair treads, and the bridge and stair treads stabilize the screen. Mark installed temporary treads so that the stairs are usable until the finished treads can be installed.
Kitchen install

Island – facing the living space

View of the pantry wall (with our fridge in the way)
We have a kitchen! And it’s gorgeous. Ordered our kitchen from Astro and had Kosta do the install. He was a pro. Took him 3 days. We have a combo of a white, glossy laminate for the functional kitchen drawers and a brown ash, sandblasted finish, on the doors facing the living space. For more on our kitchen design and layout, read this post.
Our counters will be installed next week. We decided on Caesarstone, in a dark cement finish. The counter is from Solid Decorum. And we have some beautiful ash butcher block from the Wood Source for the sill-come-counter under the window.
Tiles

Living room tiles (pre-grout)

Bathroom floor tile (pre-grout)
The majority of our floor tiles have been laid. With the remaining to be completed and grouted over the weekend. We have quite a bit of tile in our house. In our bottom floor entry, and our main floor living space, we went with a dark, larger-format tile, arranged in a staggered pattern Mark designed. We’re really happy with them. In our upstairs bathrooms, we opted for a 1” x 3” black tile on the floor, which conveniently hide our linear drain in the master bath. And a larger format white subway tile on the walls. We’ve got a lot of wall tile in our master bath because of our sloping ceilings. Really look forward to seeing it go up – next week.
We’ve also been very happy with our choice in tile contractors. Flowtopp. Highly, highly recommend them. Tiles was sourced from Ceragres. We used Gate on the main floors (in Licorice), Unit on the bathroom floors (black), and I forget for the bathroom walls…
By the way, we aren’t concerned in the slightest that we’ll have cold toes on ceramic tile. We won’t have any thermal bridging thanks to Passive House. We also have a lovely area rug we purchased on our Moroccan honeymoon (years ago now, wow) for the living room, to soften up all the hard surfaces.
Priming and painting

Looking down the void our bright white walls
The house has been primed and painted. Quelle difference. It’s starting to feel like a finished house. We went with Benjamin Moore, Chantilly Lace, in a flat finish (aka. white). We understand that an eggshell finish cleans more easily, but wanted to make sure that when light washes against our walls, they’ll look smooth and dreamy. Flat does a better job at hiding blemishes. We enlisted the services of Michael Fenton, who helped us paint our last house as well. This man knows his paint.
ERV and heater install

Mission control

The hair dryer heater
Mark is nearly finished installing the Zehnder ERV and ground source heat exchanger. The units are hung in place and most of the ductwork is connected. Our 4kW Thermolec duct heater is also in place. This is the heater for the whole house! It’s small enough for our 3 year old daughter to hold on her lap while she eats ice cream. Nathan from Ackland Plumbing will be priming our ground loop and connecting it this coming week.
Hot water tank install
Nathan from Ackland Plumbing also installed our Stiebel Eltron heat pump hot water tank. It’s an 80 gallon tank that uses an air source heat pump to heat the water (meaning super energy efficient). It looks cool too.
Siding
Our siding is finished and looks fantastic. Thanks to Graham Dorey.
Final siding on the roof deck

That's a tall ladder
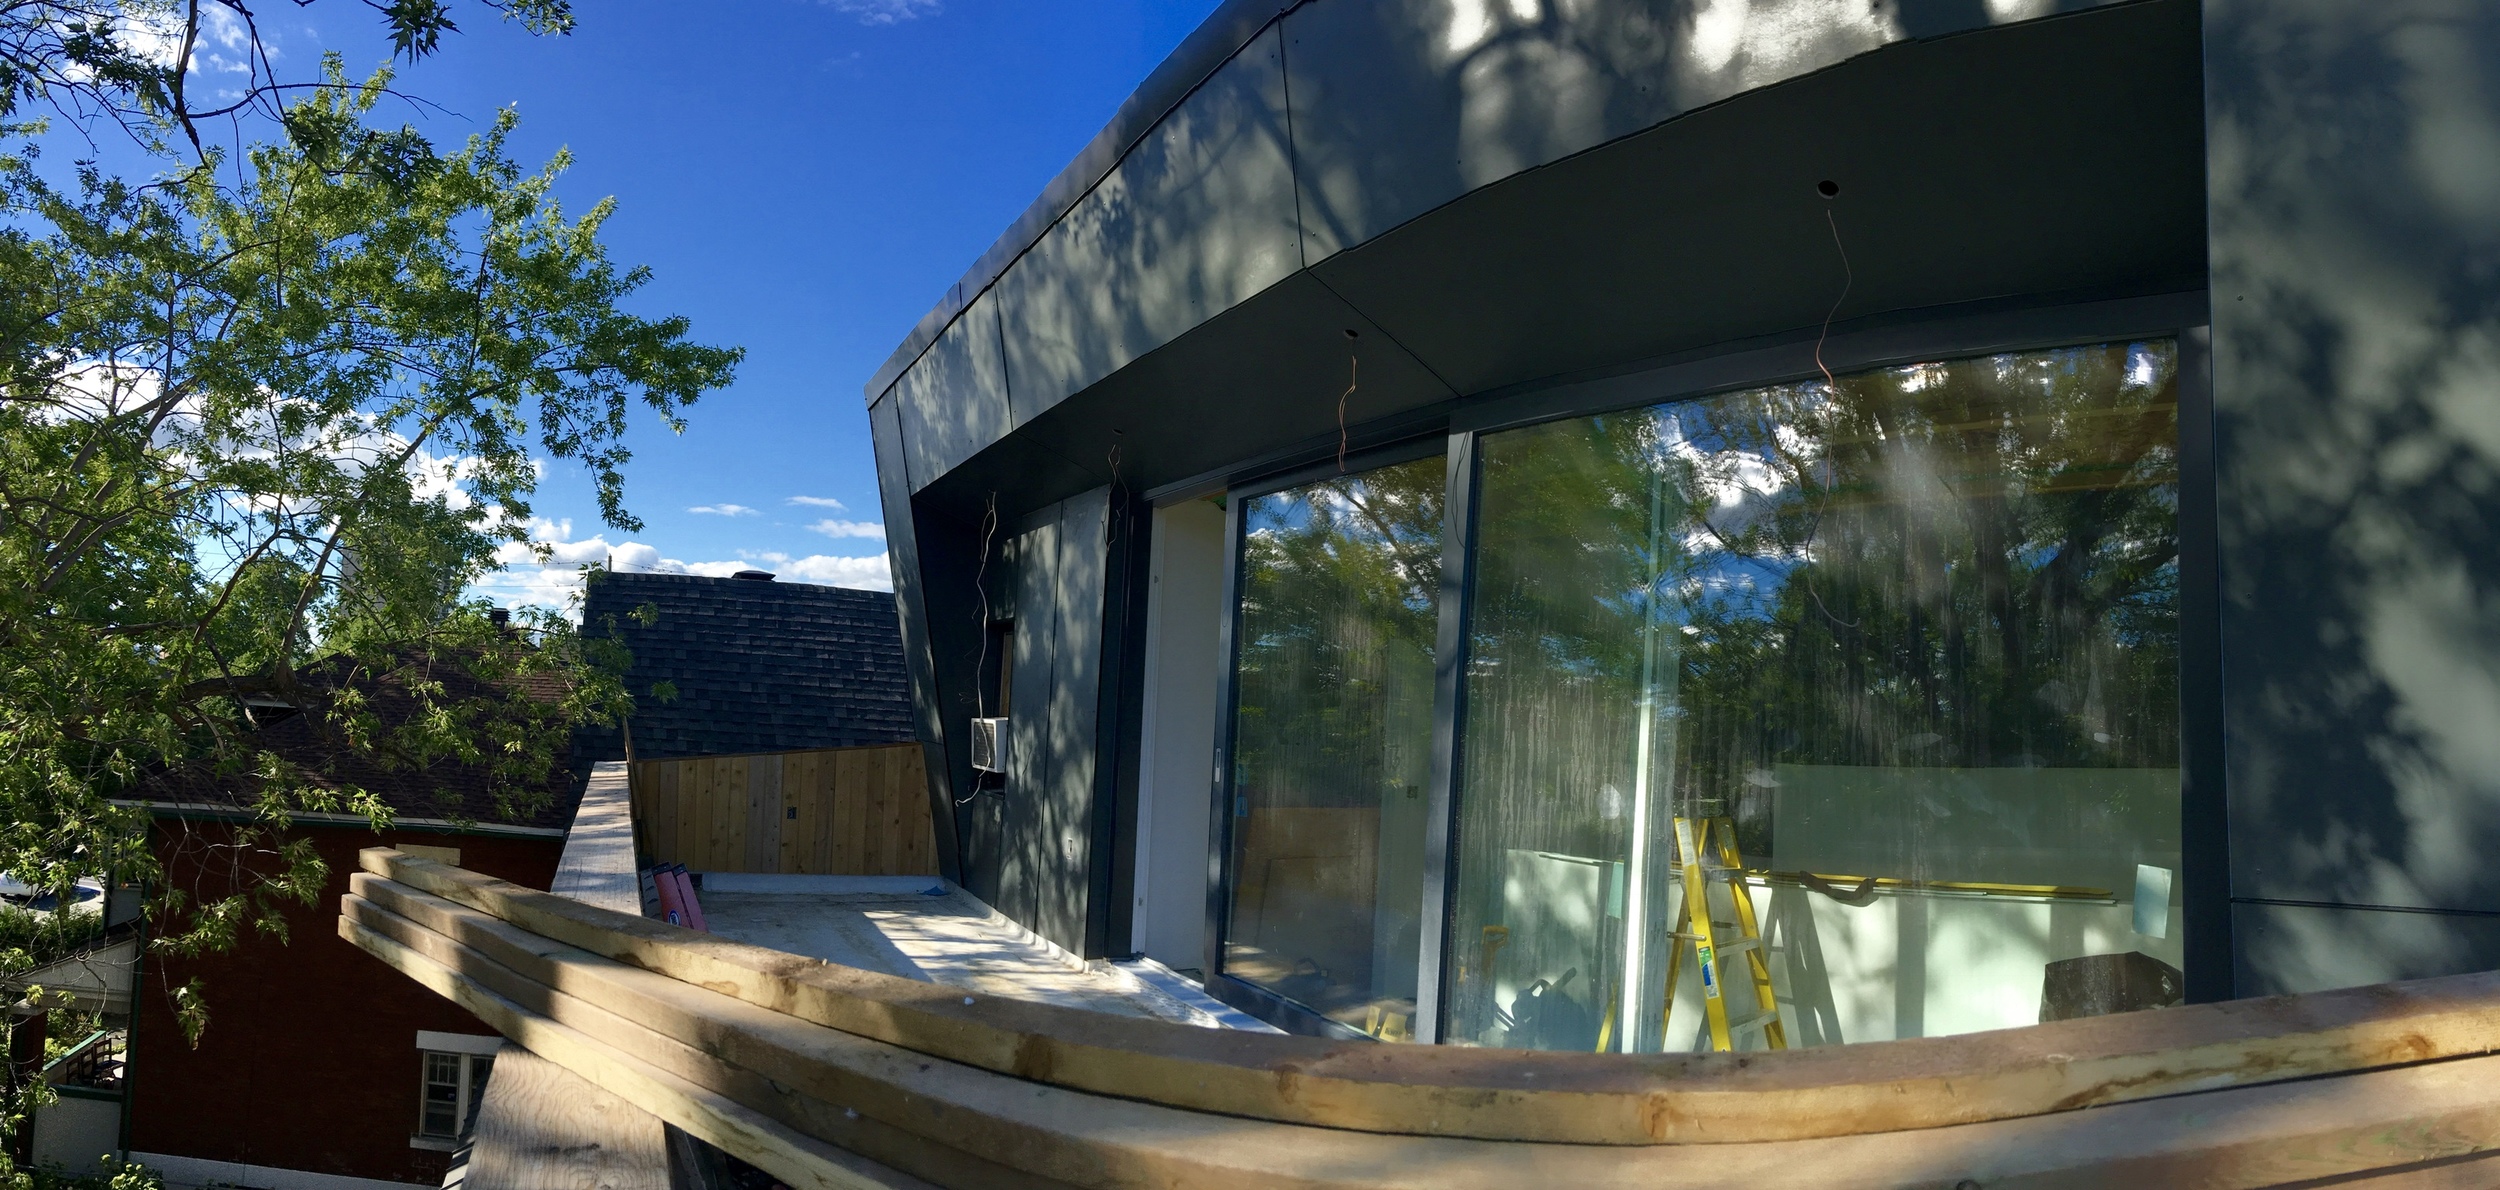
Roof deck

Our most-finished space
Our rooftop deck also looks amazing. Thanks to Graham Dorey. Who struggled with a strained knee, from a football accident and not the house, these past couple days. Going up and down a ridiculously high ladder with decking materials.
We have yet to install a railing, which we’ll need for occupancy. The building inspector nay’ed our initial design, because it didn’t meet the building’s code definition of safe. He considered it climbable. He did say, however, that if we built a mock-up, he’d come look at it and assess the climbability in person. So that’s something we’ll be progressing next week. And/or we’ll look at redesigning it.
Front deck
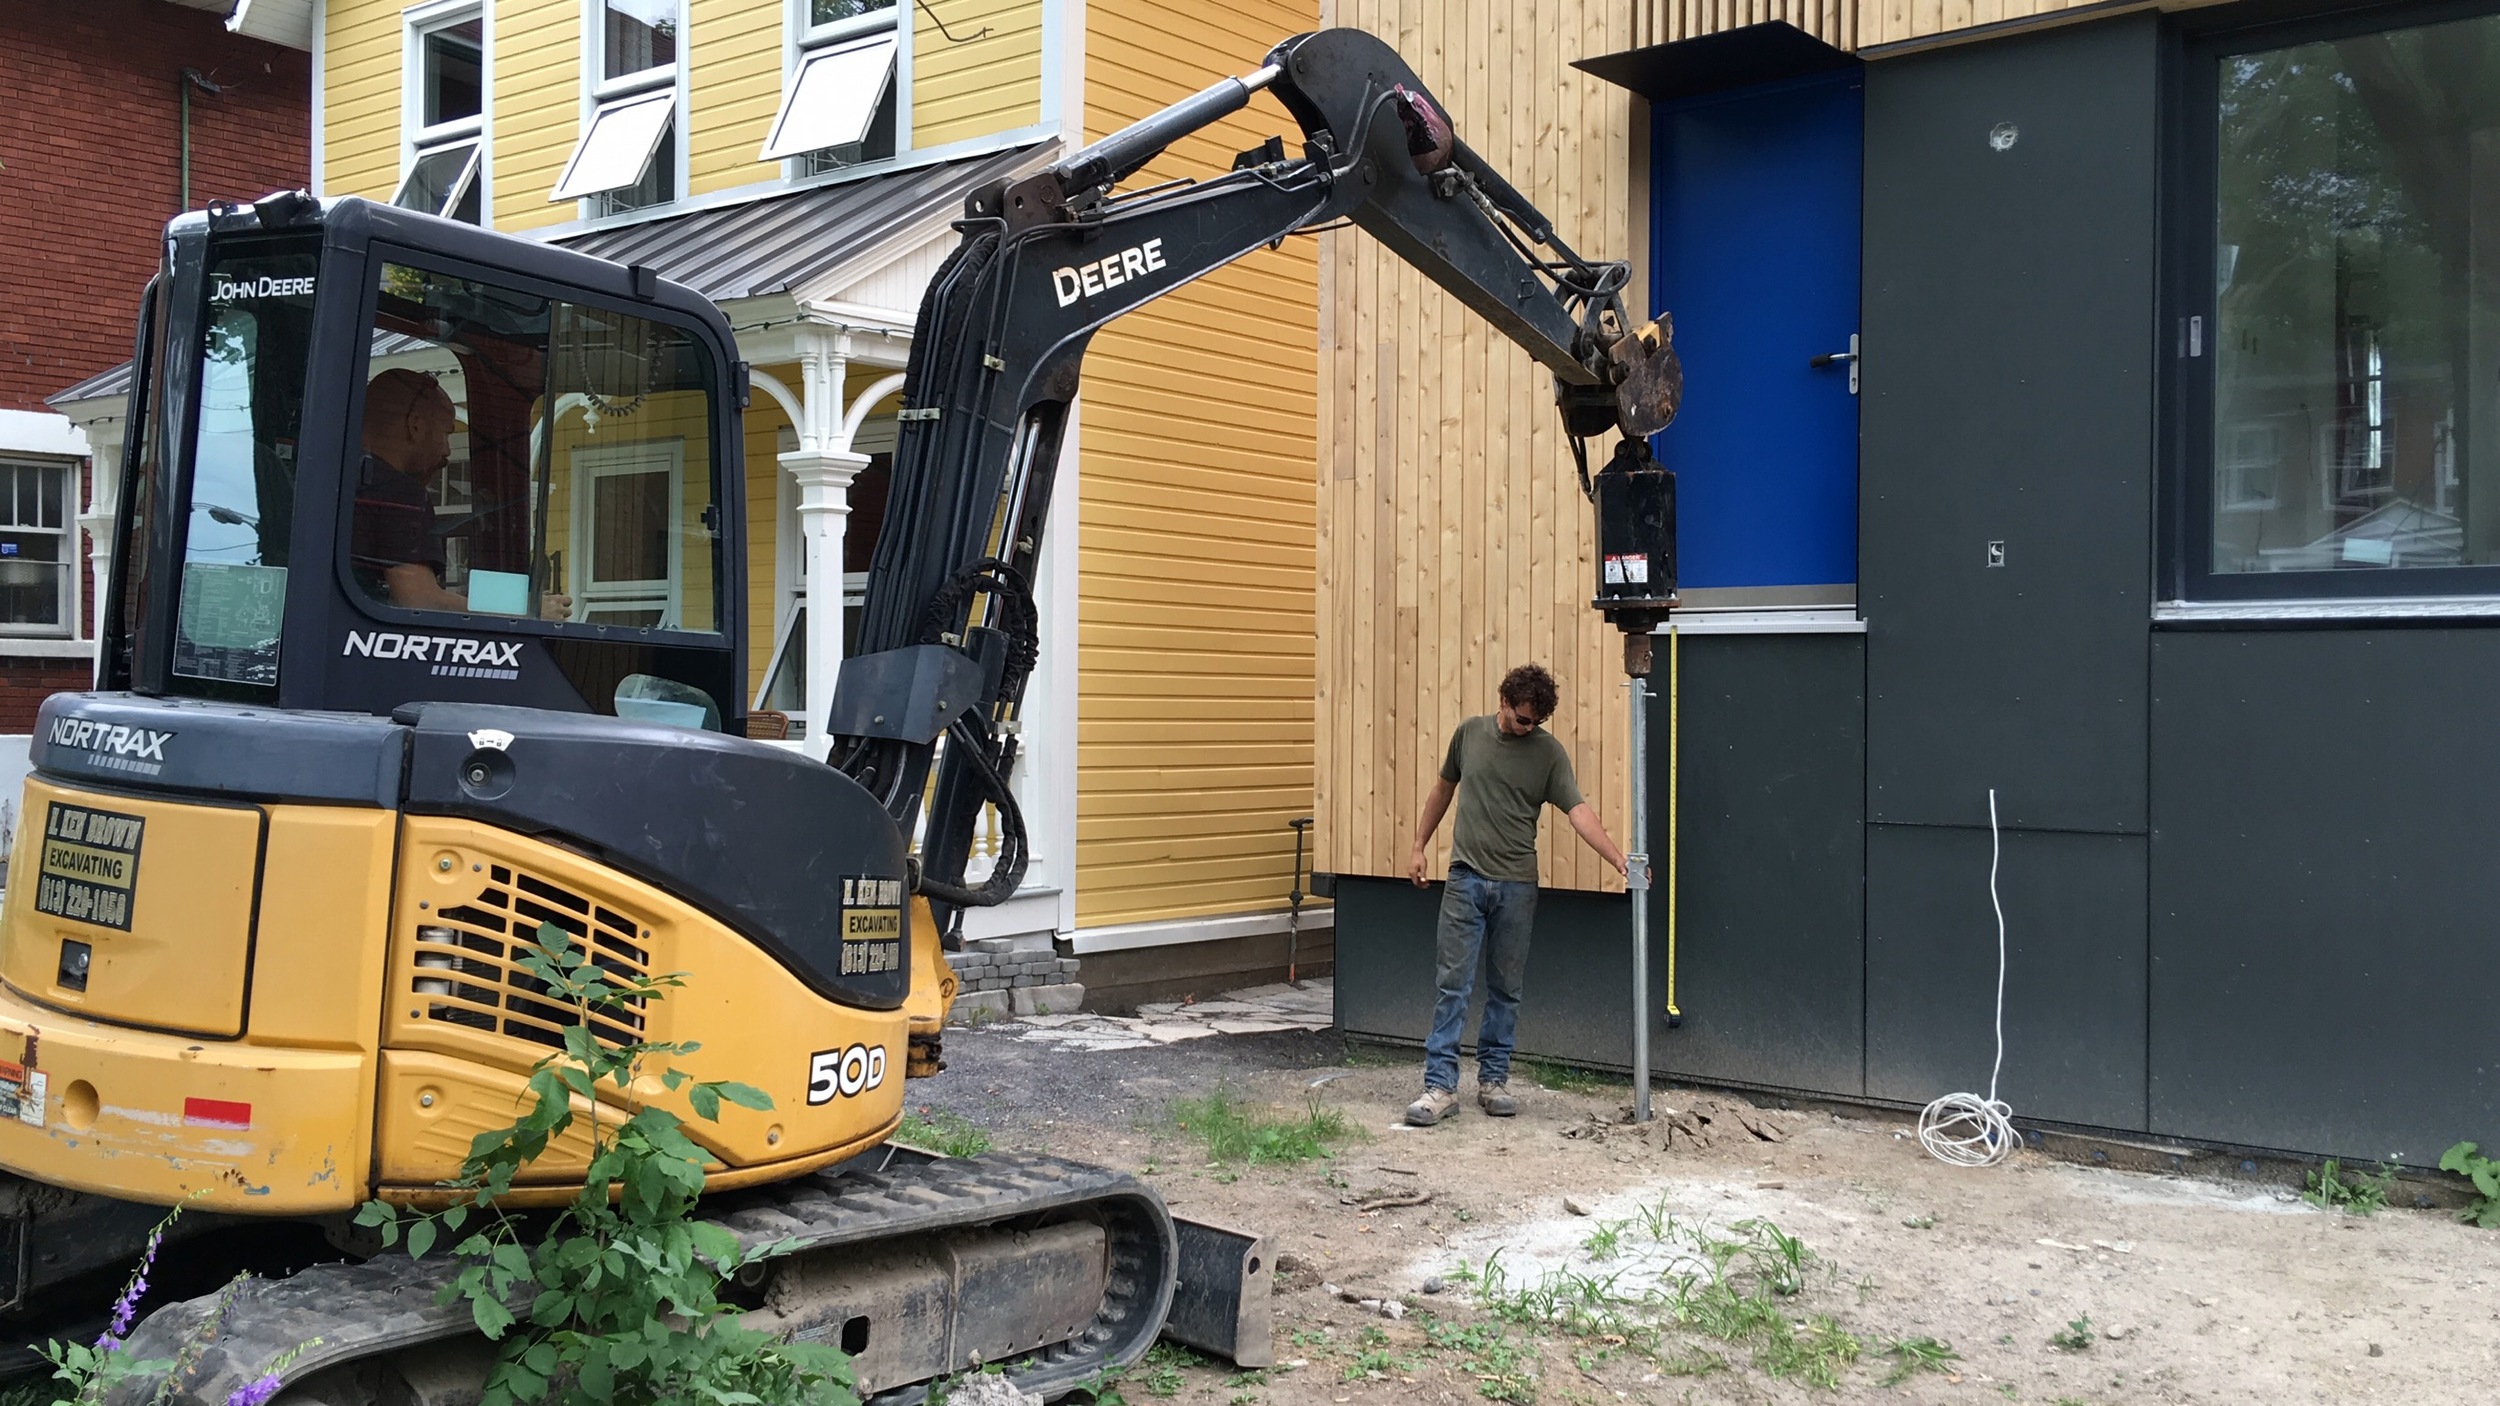
Helical piles going in
Our front deck build is underway. Step one was to get some helical piles drilled into the ground to support the structure of the deck. Why helical piles? To minimize root damage to our big tree out front. A more typical deck pile requires digging of a hole much larger than the post itself. Whereas, a helical pile requires a hole only as large as the diameter of the pile itself, which you see in the picture is quite small.
Step two was to lay some landscape fabric and gravel for underneath the deck. Mark did all the gravel moving himself in the humid, sweltering heat that is Ottawa in July. Deck build is set to start this weekend and continue over the course of next week, with Graham on the job.
That’s all folks. I’m sure I’ve missed things so I’ll be sure to write more frequently over the final weeks to come. If for some reason you don’t hear from me, it’s because we’re building a house, and are busy building it.