The construction mortgage demystified (part 1 of 2)

I have been bugging Mark to write this post for a long time now. Fortunately/unfortunately he's too busy trying to get our house built. Thought I’d give it a shot. Not a bad idea for me to do anyhow, seeing as how it will probably bring clarity and ensure that I actually understand it too! I should be able to explain it or I have no business getting one.

As a disclaimer: every mortgage is unique, and I am in no way an expert. This is simply how it is working for us. Also, don't be discouraged if you don't understand it first time 'round. We met with our bank earlier this week and our banker had to ask another banker how it worked, and then we all figured it out together using a good ol' fashioned paper and pen.

So here goes.

Step 1: estimate project cost (A + B = C)

Rewind to a year and a half ago. When the land went up for sale. Before we put our offer on the land, we spoke to a construction mortgage specialist at Desjardins. Working with hypotheticals, guessing a best and worst case scenario for the sale of our home at the time, he was able to help us figure out how much money we might have to work with (C). At the same time, Mark and I were formulating ideas as to what kind of house we wanted to build on the lot (i.e. how big) and used a basic cost per square foot to help us do the math on the build (A). (I think we used around $250-300/sq.ft). In the simplest terms, the cost of the land (B) + the cost to build (A) would equal our project total (C) and therefore how much our construction mortgage application would be for.

The numbers were a uncomfortably high. But compared to the prices of older fixer-uppers and newer infills in the neighbourhood, there was no question: we had to do it. (We also wanted to…) When Mark and I decide we’re going to do something, we do it. There’s no half way for us. The land across the street was the only place in the city we wanted to be. There apparently was a competing bid on the land, so we made sure ours was adequately high and wrote a sympathetic letter to the neighbours selling the lot, hoping to warm up the offer.

It was accepted (yay) with a three week condition, which was based on the next step of the process: getting the bank to approve us for the construction mortgage. 

Step 2: get approved

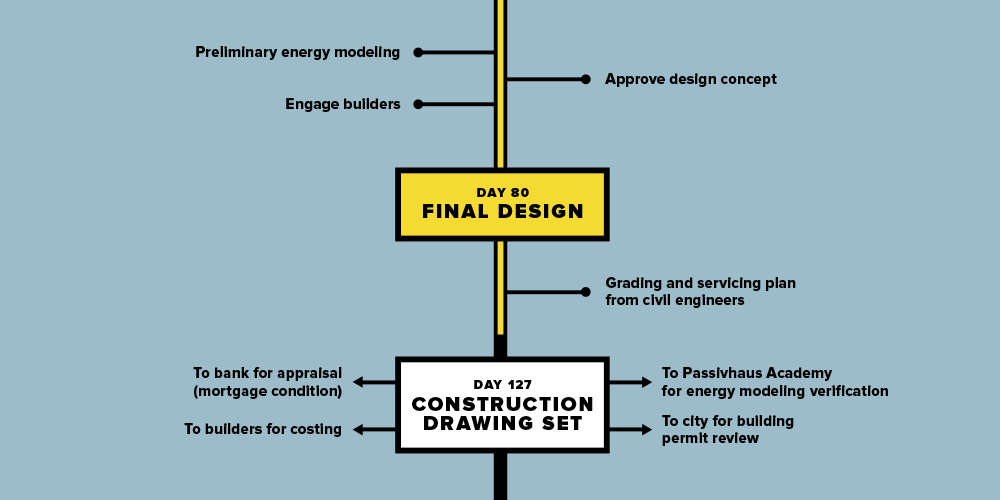
In order for the bank to dish out the funds, we had to show them we could actually build a house on the land that would be appraised at a high enough value to warrant dishing them out. This meant that in three weeks time, we had to design a house, estimate the cost to build said house and get it appraised…Or else we’d lose the land. 

I might just add here that we were at a bit of an advantage because of Mark-itect. I wouldn’t normally suggest (and neither would he) that you design a house over the course of a weekend. But like I said “when we decide we’re doing something…”

Working around the clock, Mark and I designed a house. It was a good house. One that a has since evolved, but the basic program remains (and should theoretically be appraised at the same value). Mark was able to cost the build for us.* The bank appraised it at exactly what we were hoping they would.

  • This is where you want to enlist the services of a professional, be it an architect, builder or developer. Because the bank will not be satisfied with you ball-parking your build cost as a layman. Neighbours of ours up the street are GC’ing their own infill house, similar to ours, but neither are industry professionals. Which means the bank required 3 quotes from every single trade (from framers to painters), prior to approving their mortgage. A heck of a lot of work. I suppose if you didn’t have the three week condition, as we did, this task would be less daunting. Nonetheless.


Step 3: get approved...again

Because our “downpayment” would be less than 20%, our mortgage needed to be CMHC approved. Our Desjardins construction mortgage specialist, Etienne, forwarded on all the relevant information to CMHC.

Finally, we got the green light from both and the land was officially ours. Validation complete. It was a stressful three weeks, to say the least. 

Now that we’re finally approved, moving on to part two of this series, how it all works.

Soft costs hit hard

As we’re getting costs and quotes in, I’m putting together a spreadsheet. There are some numbers I really dislike: the soft costs. The fees. And the HST. Oh the evil that is HST.

We initially thought we ‘did good’ by buying empty land. By doing so, we wouldn’t have the headache or the costs associated with a demolition or renovation, which could easily amount to 50K or more. HST, however, negates any potential savings. We had to pay HST on our land. If you buy a used house (even if you’re just going to demo it), you’re off the hook.

Building is expensive. The soft costs are a major culprit. Half the build cost is for services. Services which we now pay 13% on. Argh. The City of Ottawa has an $18,000 development fee they’re going to zing us with if the permit goes through. That’s on top of our $1,800 permit application. We are building a house on an urban lot. Why? What for? The $18k doesn’t even include road closures or bringing services (hydro and water) to the lot. 

The numbers are frustrating. What to do? We’re working hard on bringing our build costs down, but no matter how well we do on that end, the land purchase doesn’t change, the fees don’t change, and HST will be added. Death and taxes: what're you gonna do?

So here’s a little tip: buy land for as little money as you possibly can. Duh, right? If we wanted to build outside the downtown core, we would likely not be feeling the financial squeeze we are by buying an expensive city lot. If we took our exact house and built it in Saskatchewan, we’d immediately cut costs in half. Maybe a move is in the cards? Just jokes.

How long will it take?

house build tasks and timeline

Mark and his partners are busily working away on our construction drawing set. When they are complete, they will represent a rather large milestone in the project. Mark claims he is going to be finishing them tonight, post power nap…if he ever wakes up from it. I don’t blame him for taking a nap — he is running two companies, building a house and has a baby, a two-and-a-half-year-old and a fancy lady, after all. There aren’t enough hours in the day. He should get a bit of a breather once they are complete as they’ll be in other peoples’ hands for a short while.

The construction set will go to:

  1. Our builders for more accurate costing
    Mark and I chose one of our builders, Cornelis Grey, back in the fall, before the redesign. We did this because we wanted to establish an open, working relationship — one where we could share ideas back and forth and ensure the project would be cost effective. Our other builder, Green Giant Design Build, was recruited because traditional builders simply can’t compete with pre-fab construction prices. So the two of them will be working in tandem. They are already very familiar with the design and have given us a couple cost estimates, but the construction set will go in to even more detail than they’ve already seen. The more detail and knowledge they get upfront, the more accurate they will be able to cost, resulting in what we hope will be fewer $$ surprises. This round of costing will be the 'fixed' one we sign off on.
  2. The city for building permit
    We’re not seeking any amendments to zoning or building code so this should be a fairly smooth process. Or at least we hope it will be. You never know…I imagine leading in to spring there will be quite a few applications in which might generate a bit of a back log. Mark estimates 2–3 weeks. We already have an application open with them from our initial design back in the fall, so theoretically we’ll be able to submit these drawings under the same application. As a side note: I hope that in the future, municipalities will make an attempt to fast-track green builds like ours. There are no incentive programs or rebates for us do-betters, the least they could do was not stand in our way of getting it built.
  3. The appraiser assess value
    As part of our construction mortgage, our house design needs to be appraised at a high enough value for the bank to dish out the funds. Our banker whiz is Etienne at DesJardins. Another side note:
    We often hear talk about green building being between the architects, builders and clients, but many other professions and institutions are involved as well. If the market is going to shift, change needs to happen with them too. Banks and real estate agents do not yet see the added value that building a Passivhaus brings nor how to market them. The appraiser wants to know what we're installing granite and hardwood nevermind r-values and energy efficiency. 
  4. The Passivhaus Academy for energy modelling
    Mark is continuously editing his own Passivhaus model (where he inputs a whole bunch of variables related to our house into a computer program which then generates an estimation of energy consumption) and the model appears to be performing well. Mark is a certified Passivhaus designer, but for a house to become Passivhaus certified, it has to go through an additional verification check by a third party. We have decided to use Ireland-based Passive House Academy, where they’ve been certifying these things for years now. Having them look at the house at this stage is called a Design Stage Assurance.
     This should also take approximately three weeks. It’s not strictly necessary but it makes us feel a whole lot more comfortable knowing it will meet the standard before starting construction. They will look at the house again when it's finished and tested.

Earlier I mentioned that Mark would be gaining some breathing room once the construction set wraps up. I, however, will be holding my breath as we wait for the green light. I might have to add an addition on to Mina’s cardboard house as an outlet.

Finally...how long will it take? I’ve added a rough timeline to our numbers page. I’ll be updating and modifying it as more info comes in and as we progress with the build. Have a look-see. We've marked the start of the project as December 1st, 2014. This is when we decided to start the re-design so that it reflects the design/build process. Mark is cautiously optimistic that we will be in the house by Christmas of this year. Wouldn't that be nice. Time will tell.

Without breaking the bank

costs associated with building Passivhaus

Oh yes, there’s that. Our goal is to not only build ourselves a healthy home we will love for years and years to come, it’s also to show that there are potential monetary benefits to building in this manner. We want the construction price to be achievable for a custom modest house. Even if construction house is slightly higher than a typical custom house, the energy savings will offset those costs and pay for themselves in a short amount of time. This is what we hope and believe we will be able to show. 

Does it just come down to where we spend the money? Do we invest in the walls and windows and skimp on the finishes? Likely we will have to. And we’re totally happy to live with concrete or plywood floors, Ikea kitchens, what have you. But how far will we have to go if we want to achieve Passivhaus certification? Should we go for certification or is it enough to simply apply good Passivhaus principals to our design and build and forgo the difficult certification process? 

How far are we willing to go and where do we draw the line? 

Upgrading our windows from really good triple-glazed windows to really really good windows could cost us an extra $30,000. Building 24” thick walls instead of 18” could be another 20 thousand. Would we rather forgo the negligible window difference and install a grey water recovery system? What would improve our lives the greater? We do not have very deep pockets and not a lot of room for error. So if we go for certification and come close, but don’t get it, was it worth it? These are all questions weighing on our minds. When we have the answers, we’ll let you know.